Cisco IOS-XE based Router/Switch updating IOS in install mode
With IOS-XE based network devices, Cisco introduced a new way to run the operating system which is called "install mode". The old/legacy way to load the operating system is still there which is now called "bundle mode". The recommended way to run the OS in IOS-XE based devices is install mode.
With the new "install mode" all the operating system files are already extracted as "pkg" files and they are loaded into the device's memory using a provisioning file named "packages.conf". As OS files are already extracted and directly loaded into the memory; this mode has faster boot time and consumes less RAM than bundle mode (legacy) and is the recommended method.
Cisco has long list of documentation; how to use "install mode" in the network devices. In today's post I will show how to use install mode during firmware update where the network administrator has full control.
Let's introduce our topology -
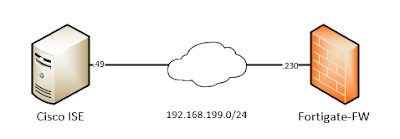
Topology

01 - Network Topology
We have a simple topology. Our router - RO_01 (192.168.199.91) is directly connected with Mgmt_Server (192.168.199.92) over network 192.168.199.0/24. From Mgmt_Server we will connect with our router and perform all the maintenance works required for firmware upgrade in install mode. We will show the whole procedure using a Cisco Catalyst 8000V router. The major difference between a virtual appliance and physical box (router/switch) is one extra step required during OS update when we also need to update the ROMMON version running in the router/switch.
Basic configuration of the router
We have just some basic configurations in the router so that we can configure the router over SSH and SCP server enabled to upload new firmware image to the router. The configuration is shown below -
hostname RO_01
!
aaa new-model
aaa authentication login Console_AAA local
aaa authorization console
aaa authorization exec Console_AAA local
!
username admin privilege 15 secret 8 $8$4TcDFT3q.9Gh6E$tLvKIBi5rVvc8cctpf08
!
interface GigabitEthernet1
ip address 192.168.199.91 255.255.255.0
!
ip ssh version 2
!!! SCP server enabled to upload firmware
ip scp server enable
!
line vty 0 15
authorization exec Console_AAA
login authentication Console_AAA
transport input ssh
!
Upload firmware to the router
First we need to find where to upload the firmware in the router's storage. We type command below -
#dir ?
/all List all files
/recursive List files recursively
all-filesystems List files on all filesystems
!!! We will use bootflash, not flash in any commands; see Note
bootflash: Directory or file name
cns: Directory or file name
crashinfo: Directory or file name
flash: Directory or file name
null: Directory or file name
nvram: Directory or file name
system: Directory or file name
tar: Directory or file name
tmpsys: Directory or file name
webui: Directory or file name
| Output modifiers
<cr> <cr>
Note: If our device has both "bootflash:" and "flash:"; use bootflash: for all file system commands. In reality flash: is an alias of bootflash:. But different IOS version's bootloader (ROMMON) has several bugs; sometimes the commands does not work when we use flash:. And the bootflash: always works and we will use that throughout this blog.
As the router has both SCP and SSH server enabled; we can upload new firmware image from our Mgmt_Server to the router. We can use scp or putty's pscp command to upload files to the router. In our case; we will use putty's pscp to upload firmware to the router.
!!! Uploading firmware file using SCP
!!! pscp -P 22 -scp source_file username@Device_IP:destination_file
# pscp -P 22 -scp .\c8000v-universalk9.17.09.01a.SPA.bin admin@192.168.199.91:bootflash:c8000v-universalk9.17.09.01a.SPA.bin
Determine the mode of running OS
We need to find out the running firmware mode (install/bundle). We can type command below to determine the current firmware running mode (below command works for both routers and switches) -
#show install summary
[ R0 ] Installed Package(s) Information:
State (St): I - Inactive, U - Activated & Uncommitted,
C - Activated & Committed, D - Deactivated & Uncommitted
--------------------------------------------------------------------------------
Type St Filename/Version
--------------------------------------------------------------------------------
IMG C 17.08.01.0.1526
--------------------------------------------------------------------------------
Auto abort timer: inactive
--------------------------------------------------------------------------------
If the above command shows empty output in that case it means; we are running in bundle mode.
We can also check in install mode; which provisioning file is used by typing -
#show version installed
Package: Provisioning File, version: n/a, status: active
Role: provisioning file
File: bootflash:packages.conf, on: RP0
Built: n/a, by: n/a
File SHA1 checksum: ac1bc5cf28a2edd80fdc309d679173df1370a1f9
Check checksum of the uploaded file
Always a recommendation to check the checksum of a firmware image before deploying it. We can do it by typing command below -
!!! verify /hash_algorithm file_name expected_hash
# verify /md5 bootflash:c8000v-universalk9.17.09.01a.SPA.bin d94129556a0f27d7a8eebc2f997199f5
If the command above gives the output below which means our image is not corrupted.
Verified (bootflash:c8000v-universalk9.17.09.01a.SPA.bin) = d94129556a0f27d7a8eebc2f997199f5
Expanding the firmware image file
We can deploy the above firmware in install mode using different sets of command in IOS-XE. We want to have complete control over firmware installation; so we will avoid Cisco's "install" set of commands. Instead we will use "request platform" set of commands.
We will create a directory in which we will expand our uploaded bin file.
!!! Making a directory where we will expand the firmware bin file
# mkdir bootflash:c8000v-universalk9_16G_serial.17.09.01a
Create directory filename [c8000v-universalk9_16G_serial.17.09.01a]?
Created dir bootflash:/c8000v-universalk9_16G_serial.17.09.01a
Now in that directory we will expand the bin file.
!!! request platform software package expand file source_file to destination_dir force verbose
#request platform software package expand file bootflash:c8000v-universalk9.17.09.01a.SPA.bin to bootflash:/c8000v-universalk9_16G_serial.17.09.01a force verbose
Now after successful expand operation; we can view the contents of the directory to see all the files in that directory. We can see a new firmware provisioning file named "packages.conf" is created.
# dir bootflash:/c8000v-universalk9_16G_serial.17.09.01a
Directory of bootflash:/c8000v-universalk9_16G_serial.17.09.01a/
Sep 13 2022 10:15:37 +00:00 packages.conf
Sep 13 2022 10:15:37 +00:00 c8000v-rpboot.17.09.01a.SPA.pkg
Sep 13 2022 10:15:05 +00:00 c8000v-mono-universalk9.17.09.01a.SPA.pkg
Sep 13 2022 10:14:58 +00:00 c8000v-firmware_nim_ge.17.09.01a.SPA.pkg
Sep 13 2022 10:14:58 +00:00 c8000v-firmware_nim_xdsl.17.09.01a.SPA.pkg
Sep 13 2022 10:14:58 +00:00 c8000v-firmware_dreamliner.17.09.01a.SPA.pkg
Sep 13 2022 10:14:58 +00:00 c8000v-firmware_nim_async.17.09.01a.SPA.pkg
Sep 13 2022 10:14:58 +00:00 c8000v-firmware_nim_shdsl.17.09.01a.SPA.pkg
Sep 13 2022 10:14:58 +00:00 c8000v-firmware_ngwic_t1e1.17.09.01a.SPA.pkg
Sep 13 2022 10:14:58 +00:00 c8000v-firmware_nim_cwan.17.09.01a.SPA.pkg
Updating the boot variable
Now we will update the boot variable using "boot system" commands. With IOS-XE we can type multiple "boot system" commands and their priority is defined as follows - the boot command which is typed first; IOS-XE tries to load that firmware first.
!!! boot system flash provisioning_conf_file_location
!!! Do not use - boot system bootflash:packages.conf; to avoid IOS-XE ROMMON bugs
(config)# boot system flash bootflash:/c8000v-universalk9_16G_serial.17.09.01a/packages.conf
(config)# boot system flash bootflash:/packages.conf
After that we must save our configuration so that our boot variable value changes are saved permanently.
# write memory
After saving the configuration; we should check the status of our new boot variables using the command below -
# show boot
BOOT variable = bootflash:/c8000v-universalk9_16G_serial.17.09.01a/packages.conf,1;bootflash:/packages.conf,1;
CONFIG_FILE variable does not exist
BOOTLDR variable does not exist
Configuration register is 0x2102
Please read the next section carefully; if you are also updating the bootloader/ROMON during firmware/software update.
Bootloader/ROMMON update if required
Sometimes while updating the firmware, we also need to update the ROMMON version which is compatible with the new firmware version. For IOS-XE based switches; ROMMON is included with the firmware itself. But for IOS-XE based routers; Cisco provides separate ROMMON file; which needs to be installed seperately.
A new ROMMON installation requires a reboot of the device. A router with both ROMMON and firmware updates requires two reboot - one for loading up the new ROMMON and one for loading up the new firmware.
As we have said earlier we want to have complete control over update process; we will complete both ROMMON and firmware update in one reboot. For this to work we need to follow below procedure step by step.
Step 1
We must change and save our boot variables; before installing new ROMMON version (in simple terms - type your boot systems commands and save the configuration). If we change boot variables after ROMMON installation; the router will not respect out boot variables; it will boot with variables that was defined before ROMMON installation.
Step 2
After saving the boot variables; we will install the new ROMMON using the command below (example shows an ISR-4000 series router ROMMON installation).
!!! upgrade rom-monitor filename rommon_file all
# upgrade rom-monitor filename bootflash:isr4400_rommon_1612_2r_SPA.pkg all
Step 3
After ROMMON upgrade is completed; we will save the configuration -
# write memory
Reboot - load new firmware and new ROMMON
If we have completed all the steps mentioned above; the only thing left is to reboot the device; so that it loads with new firmware/ROMMON.
# reload
Cleanup of old firmware images
After reboot we can monitor the stability of the new OS version for couple of days. Then we can cleanup the old firmware images by using command below -
# request platform software package clean
With command above IOS-XE will scan all unused OS files like bin, pkg, conf in the disk and present a list of files which can be deleted. From the selection of files for deletion; we just confirm and all unused files are deleted.
This guide shows how to update the OS of a Cisco IOS-XE based devices in install mode. Cisco has provided several sets of commands to perform such an upgrade. My recommendation is to use "request platform" sets of commands; where we have complete control over update process.

Comments
Post a Comment