Network device configuration management with Oxidized (Basic)
I always like to work with open source tools. As a network engineer, we need to maintain a device configuration management system where we take backup of configuration for different networking devices like routers, switches, firewalls etc. We want to have our backups ready so that we can restore a device configuration when a device fails or replace with new one or for auditing purpose to track recent configuration changes.
Today I will talk about such a open source tools named - Oxidized. Interested readers can have a look at it's GitHub page. It is a network configuration management tool with support for diverse networking equipments. Oxidized is developed with programming language Ruby. It is very configurable, extensible and can be integrated with management tools like Librenms.
Network Topology
Our topology looks like below -
 |
| 01 - Oxidized Topology |
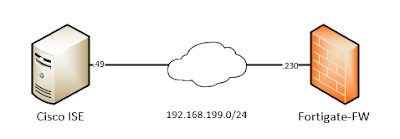
As the purpose of the blog post to discuss Oxidized, we have a very flat topology with different devices like - Cisco IOS router, Cisco Nexus Switch, Arista EOS switch and a management server where Oxidized is running. All of them are connected to same mgmt network 192.168.199.0/24. There is no special configuration in the devices, just an ip address configured. Our sole purpose is to learn how to use Oxidized and take backup of our network devices configuration.
Installation of Oxidized
Our server is running CentOS 8.2. I have disabled both SELinux and firewalld, just to focus on Oxidized configuration. If you need those services, please configure them accordingly.
Let's install the prerequisites -
#dnf install ruby ruby-devel git nginx make cmake which sqlite-devel openssl-devel libssh2-devel gcc libicu-devel gcc-c++ redhat-rpm-config
Here we are installing two extra packages git and nxinx, that we will use in advanced features discussion of Oxidized in a later blog post.
We will run Oxidized, under a user named as "oxibackup".
Let's create that user -
# useradd -m -d /home/oxibackup oxibackup
# passwd oxibackup
From now on, when we configure anything related to Oxidized it will be as logging as user "oxibackup" and change of other system settings as "root" user. Their distinction will be command prompt showing -
# - Command executed as user "root"
$ - Command executed as user "oxibackup"
Now install the required ruby gems for Oxidized. Oxidized has three important gems -
oxidized - This is the most important and required gem for running Oxidized. Other two gems are optional. In our setup, we are using an older version of oxidized because other optional two gems are not updated for the latest oxidized version.
oxidized-script - This gem gives us access to a command name "oxs", which allows us to execute a command to the network device directly. Very useful for debugging errors with Oxidized model files or when writing your own custom models. This gem is optional.
oxidized-web - This gem provides us a web-interface where we can look at configuration backups from different devices. If we use git to store our configurations, then it provides "diff" facility from the web-interface. This gem is optional.
$ gem install oxidized -v 0.26.3
$ gem install oxidized-script -v 0.6.0
$ gem install oxidized-web -v 0.13.1
These gems are installed only for the user "oxibackup" and only that user has access to them.
Now have a look at the directories created under /home/oxibackup -
$ ls -la
!!! In "bin" directory oxidized binary is installed
drwxrwxr-x 2 oxibackup oxibackup 142 Jun 23 00:07 bin
!!! In ".gem" directory all the ruby gems and required files are installed
drwxrwxr-x 4 oxibackup oxibackup 31 Jun 23 00:05 .gem
Now we will run the command oxidized only once which will create a sample configuration file for oxidized.
$ oxidized
edit ~/.config/oxidized/config --Location of created sample config
From now on our most important directory is -
"/home/oxibackup/.config/oxidized/". I recommended if you need any additional directory for example - where to save configuration backups, where to store logs etc. always create a sub-directory under that directory.
$ ls -la /home/oxibackup/.config/oxidized/
!!! backup-git-repo - Where got configuration backups will be saved as git repo
drwxrwxr-x 2 oxibackup oxibackup 6 Jun 23 00:18 backup-git-repo
!!! config - Oxidized configuration file
-rw-rw-r-- 1 oxibackup oxibackup 626 Jun 23 00:16 config
!!! logs - Logs for oxidized will be stored here.
drwxrwxr-x 2 oxibackup oxibackup 6 Jun 23 00:17 logs
!!! network.rb - A text file containing information about devices which we want !!! to take backup
-rw-rw-r-- 1 oxibackup oxibackup 0 Jun 23 00:23 network.rb
Oxidized main configuration file has the formatting of an YAML file. So, be careful when editing the file, Oxidized will show diverse set of strange errors when this file is not properly formatted. For easy editing, use the attached sample file from the reference section. Now we will edit the file - /home/oxibackup/.config/oxidized/config and it should look like below -
#File name - /home/oxibackup/.config/oxidized/config
---
username: username
password: password
model: junos
resolve_dns: false
#Devices will be backup up once every day
interval: 86400
use_syslog: false
log: "/home/oxibackup/.config/oxidized/logs/oxidized.log"
debug: false
threads: 30
timeout: 20
retries: 3
prompt: !ruby/regexp /^([\w.@-]+[#>]\s?)$/
#We can reach oxidized-web interface below ip address and port
rest: 192.168.199.135:8888
next_adds_job: false
#vars: {}
vars:
ssh_no_keepalive: true
auth_methods: [ "none", "publickey", "password", "keyboard-interactive" ]
#groups: {}
groups:
#We are creating a custom group. All group settings are defined under that.
#All our devices belong to that group.
My-Test-Group:
username: admin
password: test123
models: {}
pid: "/home/oxibackup/.config/oxidized/pid"
crash:
directory: "/home/oxibackup/.config/oxidized/crashes"
hostnames: false
stats:
history_size: 10
input:
default: ssh, telnet
debug: false
ssh:
secure: false
ftp:
passive: true
utf8_encoded: true
output:
#We will save our backups as git repository, so that we can have diffs between
#configuration taken at different times.
default: git
git:
user: oxibackup
email: oxibackup@family.local
repo: "/home/oxibackup/.config/oxidized/backup-git-repo/default.git"
source:
#Our list of devices is provided in a file name network.db. The format of that
# file is discussed later.
default: csv
csv:
file: "/home/oxibackup/.config/oxidized/network.db"
delimiter: !ruby/regexp /:/
map:
name: 0
ip: 1
model: 2
group: 3
model_map:
juniper: junos
cisco: ios
Now we will create another file and store the list of devices we want to take backup. In this file a single line represent a device and its related information. Let's have a look at this file -
$ cat /home/oxibackup/.config/oxidized/network.db
#File name - /home/oxibackup/.config/oxidized/network.db
#Format for defining a network device
# name:ip:model:group
C-Router-01:192.168.199.81:ios:My-Test-Group
C-Nexus-01:192.168.199.82:nxos:My-Test-Group
C-Arista-01:192.168.199.83:eos:My-Test-Group
If we want a list of model names supported by Oxidized, we go to the following link.
At this point we are done with all the required steps for configuring oxidized. Now lets start oxidized.
$ oxidized
Puma starting in single mode...* Version 3.11.4 (ruby 2.5.5-p157), codename: Love Song
* Min threads: 0, max threads: 16
* Environment: development
* Listening on tcp://192.168.199.135:8888
Use Ctrl-C to stop
We can see from the above output that Oxidized has started successfully and it will start taking configuration backups of the list of devices defined in /home/oxibackup/.config/oxidized/network.db.
In above we have manually started Oxidized. But instead I prefer to run it as a systemd service so that it starts automatically during system boot-up.
Oxidized comes with a service script, we just need to copy this file to the proper location and edit some settings in that file. After that we can run Oxidized as a systemd service.
# cp /home/oxibackup/.gem/ruby/gems/oxidized-0.26.3/extra/oxidized.service /etc/systemd/system/oxidized.service
# ln -s /home/oxibackup/bin/oxidized /usr/local/bin/oxidized
# cat /etc/systemd/system/oxidized.service
#For debian 8 put it in /lib/systemd/system/
#To set OXIDIZED_HOME instead of the default:
# ~${oxidized_user}/.config/oxidized in debian 8, then uncomment
#(and modify as required) the "Environment" variable below so
#systemd sets the correct environment. Tested only on Debian 8.8.
#YMMV otherwise.
#
#For RHEL / CentOS 7 put it in /etc/systemd/system/
#and call it with systemctl start oxidized.service
[Unit]
Description=Oxidized - Network Device Configuration Backup Tool
After=network-online.target multi-user.target
Wants=network-online.target
[Service]
#Oxidized binary location
ExecStart=/usr/local/bin/oxidized
#User who will run the service
User=oxibackup
KillSignal=SIGKILL
#Environment will be always the parent folder of .config.
Environment="OXIDIZED_HOME=/home/oxibackup/.config/oxidized"
[Install]
WantedBy=multi-user.target
After that we will activate the service through systemctl -
# systemctl enable oxidized.service
# systemctl start oxidized.service
# systemctl status oxidized.service
oxidized-web to manage configuration backups
Now we will use "oxidized-web", interface to look at our configuration backups. The version of oxidized I am using has a bug for which "diff" view in web-ui we get a error. To fix that we need to change a file below and replace a line in the code -
Then change line number 77 -
From - walker.push(repo.head.target)
To - walker.push(repo.head.target.oid)
Now let's log on to Oxidized web interface by typing in a web browser -
http://192.168.199.135:8888/
 |
| 02 - oxidized-web interface
From the web interface we can see status of our backups, when it was last backed up, view the actual configuration of a device, diff view for different versions of backups etc. I left it to the reader to explore the web interface.
oxidized-script for debugging
oxidized-script gives us access to a command named - "oxs" which is very handy when backup of certain devices is failing or writing our own custom models. With this tool, we can debug and find out what is actually happening under the hood.
$ oxs --help
Usage: oxs [options] hostname [command]
-m, --model host model (ios, junos, etc), otherwise discovered from Oxidized source
-o, --ostype OS Type (ios, junos, etc)
-x, --commands commands file to be sent
-u, --username username to use
-p, --password password to use
-t, --timeout timeout value to use
-e, --enable enable password to use
-c, --community snmp community to use for discovery
-g, --group group to run commands on (ios, junos, etc), specified in oxidized db
-r, --threads specify ammount of threads to use for running group (default: 1)
--regex run on all hosts that match the regexp
--dryrun do a dry run on either groups or regexp to find matching hosts
--protocols protocols to use, default "ssh, telnet"
-v, --verbose verbose output, e.g. show commands sent
-d, --debug turn on debugging
--terse display clean output
--list-nodes list nodes in oxidized source
--list-models list supported models
-h, --help Display this help message.
|
Let's try that with one of our device -
$ oxs -d 192.168.199.81 'show run'
With above command we will log into the device and execute the command "show run". We are using the debug flag (-d) so that we can see the details of what is happening when we execute the command. Again I highly recommend the readers to try out this tool.

Comments
Post a Comment